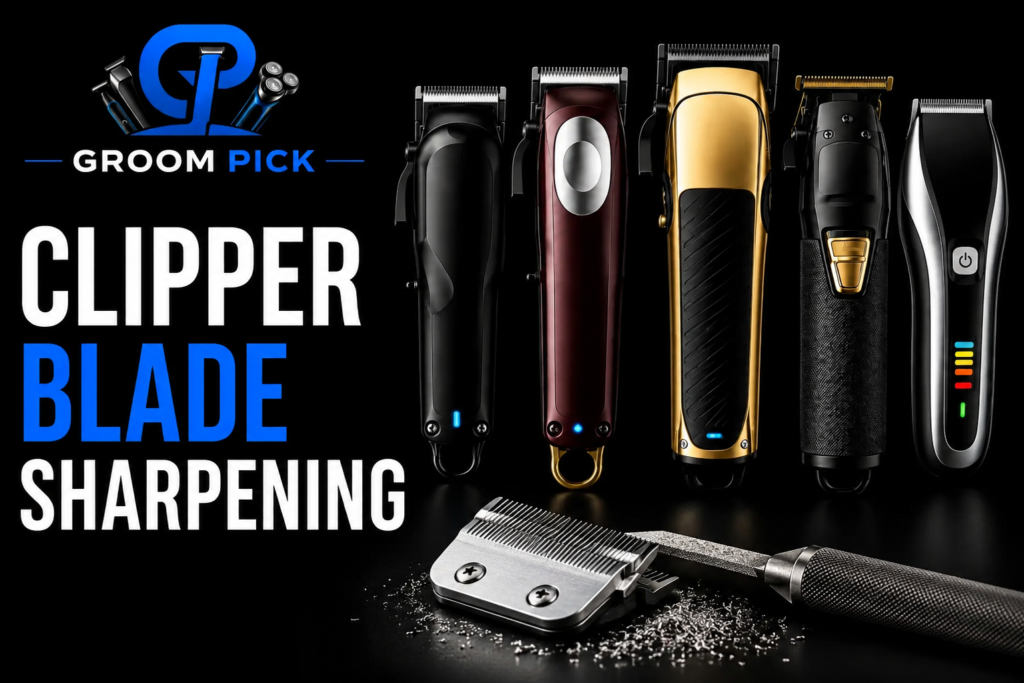
Clipper blade sharpening can bring a dull blade back to life, but sharpening is not always the first fix you need. A dirty blade, poor lubrication, incorrect alignment, or a worn blade drive can also cause pulling and uneven cutting.
For barbers, hairstylists, and groomers, knowing when to sharpen, maintain, or replace a blade can save money and prevent poor cutting results.
What Is Clipper Blade Sharpening?
Clipper blade sharpening is the process of restoring the cutting edge of a worn clipper blade so it can cut hair smoothly again.
The process normally involves inspection, precision grinding, honing, cleaning, and correct blade alignment.
A clipper blade is made to work as a cutting set. The moving blade passes against the stationary blade to cut hair. Over time, friction and repeated use can wear down the cutting edges.
When that happens, the clipper may start pulling hair, skipping sections, or needing several passes to achieve an even cut.
However, sharpening should not be treated as a cure for every clipper problem. Maintenance should come first.
If hair is packed between the blades, oil has dried out, or the blade is poorly aligned, sharpening may not solve the issue.
Table of Contents
Quick Reference: Clipper Blade Sharpening
| Factor | Details |
|---|---|
| Main purpose | Restore a worn cutting edge |
| Best for | Blades that are dull but structurally sound |
| Before sharpening | Clean, inspect, oil, and check alignment |
| Professional sharpening | Best choice for precision results |
| DIY sharpening | Possible but requires suitable equipment and skill |
| Common dull-blade sign | Pulling or skipping hair |
| Important maintenance | Cleaning, lubrication, and alignment |
| Replacement needed | Severe rust, broken teeth, or excessive wear |
| Best storage | Clean and dry location |
| Main goal | Smooth, consistent cutting |
Why Do Clipper Blades Become Dull?
Clipper blades become dull because their cutting edges experience repeated friction and wear during use.
Dirt, hair buildup, poor lubrication, moisture, and abrasive material can make that wear happen faster.
Professional clippers can run for many hours each week. Grooming blades may face even more demanding conditions because animal coats can contain dirt and other abrasive particles.
Common causes of dull clipper blades include:
- Frequent professional use
- Hair and debris trapped between blades
- Insufficient cleaning
- Poor lubrication
- Rust or corrosion
- Cutting dirty or abrasive material
- Dropping the blade
- Bent or broken teeth
- Incorrect blade alignment
- Worn blade components
A blade that looks dull may not actually need sharpening.
For example, imagine a barber finishes several haircuts and notices the clipper pulling hair. The first reaction may be to sharpen the blade. But if the blade is packed with hair and has not been properly oiled, cleaning and lubrication may restore its performance.
That is why inspection should come before sharpening.
How Do You Know When Clipper Blades Need Sharpening?
Clipper blades usually need sharpening when proper cleaning, oiling, and alignment no longer restore smooth cutting.
Pulling, skipping, uneven cutting, and repeated passes are common signs that the cutting edge may be worn.
1. The Blade Pulls Hair
A sharp blade should cut hair without repeatedly catching or pulling it.
If the blade is clean, properly aligned, and lubricated but still pulls hair, sharpening may be necessary.
2. The Clipper Skips Hair
A worn cutting edge can cause the clipper to leave small patches of longer hair.
This is especially noticeable during fades, outlines, and detailed grooming work.
3. You Need Several Passes
A sharp blade should remove hair efficiently.
If you repeatedly go over the same section to achieve the desired result, check the blade condition.
4. Cutting Performance Feels Slower
A worn blade can make a familiar clipper feel less effective.
The motor may still sound normal, but the blade may no longer move through hair as efficiently.
5. The Blade Shows Wear
Look closely at the teeth.
Bent, chipped, broken, or heavily worn teeth can affect cutting performance. Some types of damage may require replacement rather than sharpening.
6. Cleaning Does Not Fix the Problem
If the blade is clean and properly lubricated but still cuts poorly, sharpening becomes more likely.
How to Sharpen Clipper Blades Properly
Professional clipper blade sharpening requires more than simply rubbing the blade against a sharpening stone.
The cutting surfaces need to retain their correct shape, angle, and relationship with one another.
Step 1: Turn Off and Disconnect the Clipper
Always switch the clipper off before removing a blade.
For corded equipment, disconnect it from the power source. This reduces the risk of accidental activation while you work.
Manufacturer instructions should take priority because blade removal methods vary between clipper models.
Step 2: Remove the Blade
Remove the blade according to the manufacturer’s instructions.
Keep the blade components together when possible. The moving and stationary blades work as a matched cutting system.
Andis recommends turning the clipper off and unplugging it before removing a detachable blade.
Step 3: Clean the Blade
Brush away loose hair and debris before sharpening.
Pay special attention to the gap between the moving and stationary blades. Buildup in this area can restrict movement and reduce cutting performance.
Do not assume every blade should be washed with water. Some clipper blades can rust when exposed to moisture, so follow the care instructions for your specific model.
Step 4: Inspect the Blade
Check the entire blade set for:
- Broken teeth
- Bent teeth
- Rust
- Corrosion
- Deep scratches
- Uneven wear
- Warping
- Excessive material loss
A severely damaged blade may be more suitable for replacement than sharpening.
Step 5: Grind the Cutting Surface
Professional sharpeners use precision grinding equipment to restore the cutting surface.
Only a controlled amount of material should be removed.
Grinding too aggressively can change the geometry of the blade. That can make the blade cut worse, even if the surface looks smooth.
This is one reason professional sharpening is often a better choice for expensive clipper blades.
Step 6: Hone the Blade
After grinding, the cutting surface may need honing.
Honing helps refine the edge and remove roughness left by the grinding process.
The exact technique depends on the blade design and sharpening equipment.
Step 7: Clean the Sharpened Blade
Remove any abrasive residue or metal particles after sharpening.
The blade should be clean before it is reassembled and lubricated.
Step 8: Reassemble the Blade
Put the moving and stationary blades back together correctly.
Do not force the components into position.
A blade that is assembled incorrectly can cause poor cutting and unnecessary wear.
Step 9: Align the Blades
Blade alignment is one of the most important parts of clipper maintenance.
A sharpened blade can still perform poorly if the cutting surfaces are positioned incorrectly.
For some blade designs, the moving blade should sit slightly behind the stationary blade. The correct position varies by model, so use the manufacturer’s specifications instead of relying on a universal measurement.
Step 10: Oil the Blade
Apply the correct clipper oil after sharpening.
Lubrication helps reduce friction and heat while allowing the blades to move smoothly. Manufacturer instructions differ, but regular blade oiling is a standard part of clipper maintenance.
Avoid over-oiling.
Too much oil can attract debris and, on some models, may allow liquid to reach the motor.
Step 11: Test the Clipper
Run the clipper and listen for unusual sounds.
Test it on clean hair.
The blade should cut smoothly without excessive pulling, skipping, or unusual vibration.
If performance is still poor, inspect the alignment, blade drive, motor, and blade condition.
How Does Professional Clipper Blade Sharpening Work?
Professional clipper blade sharpening uses controlled grinding and finishing methods to restore the cutting surfaces without unnecessarily removing metal.
A good service should also inspect the blade for damage and check whether sharpening is worthwhile.
The process can include:
- Blade inspection
- Disassembly
- Cleaning
- Surface grinding
- Edge honing
- Deburring
- Cleaning
- Reassembly
- Alignment
- Performance testing
The exact process varies by blade type.
Adjustable blades, detachable blades, trimmer blades, ceramic blades, and animal grooming blades can have different construction and maintenance requirements.
A professional service should know the specific blade design before sharpening it.
Can You Sharpen Clipper Blades at Home?
Yes, you can sharpen some clipper blades at home, but the process requires the right equipment and experience.
For most users, professional sharpening is safer because incorrect grinding can permanently change the blade’s cutting geometry.
DIY Clipper Blade Sharpening Pros
- Can reduce long-term sharpening costs
- Convenient for frequent users
- Useful for experienced technicians
- Can reduce waiting time
- Gives you control over your maintenance schedule
DIY Clipper Blade Sharpening Cons
- Requires suitable sharpening equipment
- Requires technical skill
- Easy to remove too much material
- Incorrect angles can reduce cutting performance
- Grinding can create excessive heat
- Poor finishing can leave rough edges
- Incorrect reassembly can affect alignment
A basic knife sharpener is not automatically suitable for clipper blades.
Clipper blades have specific cutting surfaces. A sharpening method designed for kitchen knives may not reproduce those surfaces correctly.
What Is the Difference Between DIY and Professional Sharpening?
DIY sharpening gives you control over the process, while professional sharpening offers precision and experience.
The better choice depends on how often you sharpen blades, what equipment you have, and the value of the blades you use.
| Feature | DIY Sharpening | Professional Sharpening |
|---|---|---|
| Equipment | You provide it | Included in service |
| Skill | High | Professional |
| Cost per blade | Potentially lower | Service fee |
| Consistency | Depends on technique | Usually more consistent |
| Risk | Higher if inexperienced | Lower with a qualified service |
| Convenience | Immediate | Requires turnaround |
| Best for | Experienced users | Most barbers and groomers |
For a professional who depends on clippers every day, a reliable sharpening service can be more practical than experimenting with expensive blades.
How Does Blade Maintenance Extend Blade Life?
Regular blade maintenance reduces the buildup and friction that can contribute to poor performance and premature wear.
Cleaning, lubrication, proper storage, and correct alignment should be part of normal clipper care, not something you do only after a blade becomes dull.
A useful maintenance routine includes:
- Brush hair from the blade after use.
- Clean buildup between the blade surfaces.
- Use an appropriate disinfecting product.
- Oil the blade regularly.
- Wipe away excess oil.
- Check for rust.
- Inspect teeth for damage.
- Check alignment after blade removal.
- Store blades in a clean, dry place.
- Avoid dropping blades.
- Replace badly damaged blades.
Wahl’s clipper-care guidance recommends cleaning blades after use, lubricating them regularly, and storing them in a clean, dry place.
For a related resource, see this guide on clipper and trimmer care and maintenance. It covers cleaning, cooling, disinfecting, oiling, and storage practices that can help maintain blade performance.
When Should You Replace Clipper Blades?
Replacement makes more sense when a blade has severe physical damage or has reached the end of its useful life.
Sharpening can restore a worn edge, but it cannot always correct broken teeth, severe corrosion, or excessive material loss.
Consider replacement when:
- Multiple teeth are broken.
- Teeth are bent.
- Rust is severe.
- The blade is badly corroded.
- The blade has been sharpened repeatedly and is excessively worn.
- Cutting remains poor after professional sharpening.
- The cost of sharpening is close to the cost of a replacement.
- The blade cannot maintain proper alignment.
Wahl’s maintenance documentation identifies dull, rusty, broken, or bent blades as conditions that can require replacement and advises replacing blade sets together.
Why Is Blade Alignment Important?
Correct blade alignment allows the moving and stationary cutting surfaces to work together safely and effectively.
Poor alignment can cause pulling, uneven cutting, excess heat, or contact with the skin.
After removing or replacing a blade, always check the manufacturer’s alignment instructions.
Do not assume that every clipper should be zero-gapped.
Some clipper designs require a small amount of separation between the cutting surfaces. The correct setting depends on the model and intended use.
How Often Should Clipper Blades Be Sharpened?
There is no single sharpening schedule that works for every clipper blade.
Usage, hair type, cleaning habits, lubrication, working conditions, and blade construction all affect how quickly a blade wears.
A barber using a clipper for several hours every day may need sharpening more often than someone using a clipper at home once or twice a month.
Groomers may also experience faster blade wear because animal coats can contain dirt and other abrasive material.
Instead of sharpening on a fixed schedule, monitor performance.
Clean first. Inspect second. Sharpen when the cutting edge is actually worn.
What Are the Best Tips for Longer-Lasting Clipper Blades?
The best way to extend blade life is to prevent unnecessary wear before it becomes a sharpening problem.
Simple habits such as cleaning, oiling, careful handling, and dry storage can make a noticeable difference.
Keep Spare Blades
Professional users should keep spare blade sets available.
If one blade becomes dull or damaged, you can replace it immediately instead of stopping work.
Clean After Use
Hair and debris can build up between the cutting surfaces.
A small cleaning brush can remove loose material before it becomes compacted.
Oil Regularly
Proper lubrication reduces friction and helps the blade move smoothly.
Use clipper oil recommended for your equipment and follow the manufacturer’s instructions.
Do Not Over-Oil
More oil does not mean better lubrication.
Excess oil can collect debris and may create problems if it enters the clipper housing.
Store Blades Correctly
Keep blades clean and dry when they are not being used.
Protect the teeth from knocks and impacts.
Do Not Drop Blades
Even a small impact can bend or chip a tooth.
Handle detachable blades carefully when changing or cleaning them.
What Are the Most Common Clipper Blade Sharpening Mistakes?
Most sharpening problems come from treating clipper blades like ordinary knives or skipping basic maintenance.
Avoiding a few common mistakes can protect both the blade and the clipper.
Sharpening Without Cleaning
Hair and debris can make a blade appear dull.
Better approach: Clean and inspect before deciding to sharpen.
Removing Too Much Metal
Aggressive grinding can shorten blade life.
Better approach: Use controlled sharpening equipment and remove only the material needed.
Ignoring Alignment
A sharp blade can still cut badly if the blades are misaligned.
Better approach: Check alignment after sharpening and reassembly.
Using the Wrong Oil
Household oils are not automatically suitable for clipper blades.
Better approach: Follow the clipper manufacturer’s lubrication instructions.
Over-Oiling
Excess oil can attract dirt and may enter parts of the clipper where it does not belong.
Better approach: Apply the recommended amount and wipe away excess.
Sharpening Damaged Teeth
Sharpening cannot restore a badly broken tooth.
Better approach: Have the blade assessed and replace it when necessary.
How Do You Troubleshoot a Clipper That Still Pulls Hair?
If a clipper still pulls hair after sharpening, the problem may be alignment, lubrication, the blade drive, or the clipper itself rather than the blade edge.
Troubleshooting the complete cutting system is more useful than repeatedly sharpening the blade.
Check Blade Alignment
Make sure the moving and stationary blades are positioned correctly.
Check for Hair Buildup
Remove trapped hair from between the blade surfaces.
Check Lubrication
A dry blade can create additional friction and heat.
Check the Blade Drive
A worn blade drive can prevent the moving blade from working correctly.
Check the Motor
If the motor is weak or struggling, a sharp blade may not solve the problem.
Check the Blade Condition
Look for chipped teeth, rust, corrosion, or excessive wear.
Andis notes that worn blade-drive components can affect cutting performance, which shows why blade problems should not always be treated as sharpening problems.
Where Should You Get Clipper Blades Sharpened?
Choose a sharpening service that has specific experience with professional clipper blades rather than a general knife-sharpening service.
A good service should understand blade geometry, grinding, honing, reassembly, and alignment.
Before sending your blades out, ask:
- Do you sharpen my specific blade type?
- Do you grind and hone the cutting surfaces?
- Do you inspect broken or damaged teeth?
- Do you check blade alignment?
- How long is the turnaround?
- Do you recommend replacement when sharpening is not worthwhile?
- Do you offer any quality guarantee?
For professional barbers and groomers, keeping a reliable sharpening service nearby can reduce equipment downtime.
Clipper Blade Sharpening Checklist
Use this checklist before deciding that a blade needs professional sharpening.
It can help you separate a genuine sharpening problem from a simple maintenance issue.
- Turn off and disconnect the clipper.
- Remove the blade safely.
- Brush away loose hair.
- Clean the blade according to manufacturer instructions.
- Inspect the teeth.
- Check for rust and corrosion.
- Check blade alignment.
- Apply the correct clipper oil.
- Test the clipper.
- Sharpen only if the cutting edge remains worn.
- Replace severely damaged blades.
- Store clean blades in a dry place.
What Should Barbers Know About Clipper Blade Sharpening?
Barbers should treat sharpening as part of equipment maintenance rather than waiting until a clipper becomes unusable.
Keeping spare blades, cleaning between clients, lubricating regularly, and monitoring cutting performance can reduce unexpected downtime.
For barbers, blade condition directly affects the finish of fades, tapers, outlines, and bulk removal.
A dull blade may force you to make more passes.
More passes can slow down a haircut and make the cutting process less comfortable for the client.
That is why preventive maintenance matters.
What Should Groomers Know About Clipper Blade Sharpening?
Groomers often put blades through demanding working conditions, so cleaning and maintenance are especially important.
Dirt and abrasive material in animal coats can increase wear and make regular inspection more important.
Keep several sharp blade sets available if grooming is part of your daily work.
A spare blade lets you switch quickly when one becomes hot, dull, or contaminated.
Clean blades after use and follow the manufacturer’s instructions for lubrication and disinfection.
Frequently Asked Questions
What is clipper blade sharpening?
Clipper blade sharpening restores the cutting edge of a worn blade through controlled grinding and finishing. The blade is then cleaned, reassembled, aligned, and tested.
Is clipper blade sharpening better than replacing a blade?
It depends on the blade’s condition. A good-quality blade with normal wear can often be sharpened, while badly damaged or excessively worn blades may be better replaced.
Can you sharpen clipper blades with a knife sharpener?
A standard knife sharpener is generally not recommended because clipper blades have specific cutting surfaces and geometry. The wrong equipment can damage the blade or reduce cutting performance.
Should clipper blades be sharpened as a set?
Yes. The moving and stationary blades work together, so they should normally remain a matched set. Follow the manufacturer’s instructions for your specific blade design.
Why are my clipper blades pulling hair after sharpening?
Pulling can result from poor alignment, insufficient lubrication, hair buildup, damaged teeth, a worn blade drive, or another clipper problem. Sharpening alone may not fix it.
When should clipper blades be replaced instead of sharpened?
Replace a blade when it has severe rust, broken or bent teeth, excessive wear, or poor performance after proper professional sharpening. Replacement can also make more financial sense when sharpening costs are high.
Sharpen Blades Carefully for Better Results
Clipper blade sharpening can extend the useful life of a quality blade when the cutting edge is worn but the blade is still structurally sound.
The best approach is to clean, inspect, lubricate, and align the blade before deciding that sharpening is necessary.
Professional sharpening is usually the better choice when precision matters.
For everyday clipper care, small habits matter too. Clean blades after use, use the correct oil, protect the teeth, store blades in a dry place, and check alignment whenever a blade is removed.
If a blade has severe rust, broken teeth, or excessive wear, replacement may be the smarter option.
The goal is not simply to make a blade sharp. The goal is to keep the entire cutting system working smoothly, safely, and consistently.